Category Archives: Music related

I Must Do Something Creative


I spend a few weekends a month gigging out. It’s really fun, and I get to play my electric guitars loud…which I love. Every now and then though I get the itch to do something creative for myself. It’s a demand from my wiring, really. If left un-quenched, it can turn into an almost neurosis-level rattle that makes me insane. It’s like having a ball baring rolling back and forth inside the dashboard of your car with every turn you make. Eventually the want and need to solve the problem heats to the fire of a nuclear blast. In the past, this has usually translated into me writing/recording music.

So, this very thing happened a few months back and I decided I wanted to learn one of my favorite songs. Then I decide to make a video of me singing and playing it. This really isn’t something I do regularly, if at all, much less share it on the blog…but hey what can I say? I’m getting older and care a hell of a lot less what people think…but as a musician I still crave peoples attention…life is messy, right? Here’s me, exercising creative demons and covering one of my favorite songs, “All Night Long” by Peter Murphy.


The Road To Minimalism II

Since the last post we have been busy, each weekend, hauling loads of stuff to Goodwill. It’s pretty incredible how much we have accumulated.

For me, I think my minimalist tendencies started a few years back, when I looked around me and realized I had something like 20 guitars. Simply keeping all these guitars around in a little 800 square foot house in south St. Louis was a challenge in itself. What happened was I began to realize, even playing multiple gigs a week, I couldn’t possibly utilize all of them. I got to a point where I stopped going to vintage guitar shops to look around, realizing I had way more than I ever needed, or deserved really. I then began getting rid of them.

Now, does this mean I’m cured? Not by a longshot. Take, for example, my pastime of building guitars (I really just part them together). The pic below is of 2 such guitars I’ve made since we got to Phoenix. One is my beloved pine Barncaster, the other is a highly functional and very playable Strat. It was a blast putting them together, a fun and intricate process. The problem is….I have managed to replace buying more guitars than I need with building more guitars than I need.

img_3843

Pine Barncaster, Superstrat. Sorry for the shitty pic

So now the idea is to get down to just a couple guitars. I already have a 95 Les Paul that my father gave me for graduating university. That one stays with me forever….so the question now is what else to keep? Is 2 or 3 guitars overkill for someone that wants to be less burdened by their belongings? Does my gigging regularly justify it? Hell I have no idea. Still adjusting to this whole thing.

fullsizerender

My 1995 Gibson Les Paul, equipped with 2 high-output Seymour Duncan pickups

The other thing I have focused on lately is selling all the little guitar parts that I have accumulated over the years working on guitars. None of it is worth a ton, but when I added it up, $10-$20 a pop, I had at least a few hundred bucks just laying around. I sell all this (along with the guitars) on my Reverb store. I’ve already sold a ton of stuff this way in the last few weeks, and I have a lot more to get listed!

Shop My Store on Reverb

Another major we are moving toward minimalism is getting a stall at the Thieves Market in Tempe, on December 3. This will be a great way to get rid of a great deal of the vintage stuff we have laying around. Expect a full report here soon. Alright, JT signing off. Stay sleazy.

Thieves Market.png


Paint It Black

I’ve made no bones about my love for the Rolling Stones.  Well, the time has come for me to see them live (while they’re still alive!!) when JT and I plus some friends depart for Desert Trip.  To say I’m excited does not do justice to the range of emotions I am experiencing … I am ready to dance my ass off and jump up and down until I can’t walk the next day (wouldn’t be the first time, might be the last time).  Living a five hour drive from Southern California has been pretty sweet.

desert-trip-poster

So, I have been cranking the tunes and getting some projects done around the house in advance of our friends’ arrival (they’re flying into PHX and we’re all trucking it out to Indio)  While we were working on some projects in the music room hanging shelves and artwork, “Paint It Black” came on our feed and I though it might be the perfect song for our new lounge.  While I know this is actually a song about a young girl’s funeral, I just think the Rolling Stone’s and Charlie Watt’s drum beat were guiding me to the perfect color for this room.

So, as a refresh, we started here:

That was sort of around move-in mess, I guess…. those were some of the only “befores” I kept around.

And now, here we are:


It’s like a little aerie as the windows wrap around the corner and it sits on the second floor facing towards the street and above the front door.  The side window has a great view towards the mountain and we originally had the desk right there but it gets too hot.

img_4606

The Danish Daybeds make a perfect spot for lounging and I love having them side-by-side.  I added a few blankets and cover for dog protection as this is one of Shenanigan’s favorite perches.  It’s hard to believe these daybeds are the same ones I scored off Mister Modtomic all those years ago.

MR MODTOMIC DANISH DAYBEDS

JT installed guitar “swing” hooks into the stud for secure guitar storage/display.  He still has a bunch of guitars in STL that need to make the trek to PHX … anyone up for a drive?  The wall shelves are from Ikea, the “Skogsta”.  The wood tones help warm things up against the blue-black walls.  This is the darkest wall we have done to date.  I thought about doing the ceiling too but my arms just weren’t up to it.

music-room-02

We have a lot more space than our first house, that’s for sure … remember that music room?

Image 10

I sure do miss those fans though!  We still have the ugly ones upstairs in the new house…

So, there just seems to be something about a music room and a moody wall color that works for us.  It’s helped to have a dedicated work space also for days when JT remotes in from home or when I need to work late and would rather be in my pajamas.  The TV is mounted on a swiveling wall mount and so it can be pulled out for watching TV/playing Playstation from the daybed or we hook the computer into it and use it as a second screen (like now, as I type).  It’s turned into a very flexible and multi-functional room, which is great.

Next stop, Rolling Stones!!  Paint it Black!!  (Something about WordPress is not letting me link to the YouTube song and I can’t find the song in our iTunes library either).  Go forth to the internet and search up some Rolling Stones! I’ll leave you with my other favorite:

Cheers!!!! CT

NCIDQ-ed!

Well I took the third and final test for my NCIDQ certification today (National Council for Interior Design Qualifications), the day after my (uneventful because I was studying/practicing like crazy) 36th birthday.  It was an eight hour sprint of hand drafting and problem solving and I somehow miraculously survived despite being a year older.  What the results are remain to be seen (14 to 16 weeks!) but I’m so relieved to have that strain off my back for a little bit.

Have a great rest of your weekend!  JT is gigging tonight with “Radio London,” an 80s group he plays guitar in, and I was excited to go see him play but I am too spent to move off this couch.

dsc_1299

I think the dogs and I are going to catch up on some “Friends”.   I love the 80s but I think I may be more of a 90s girl!

Cheers! CT


1975 Fender Precision Bass with Jazz Bass Neck

Sometimes getting clear dates on vintage guitars and basses is a mess. It’s an easy enough question; “what year was this made?” It’s not unreasonable to think doing a little research for about 20 minutes on the internet will answer it for you, but in a lot of cases (especially this one) the ride towards the truth is damn bumpy.

I came across this on craigslist, which was advertised as a 1976 Fender Precision Bass with Jazz Bass neck. Lot’s of parts had been replaced years ago, but with the first look I knew I could sell it. Sometimes mojo and sheer coolness make up for a ton of non-original parts. I’ll pocket that one for a future blog perhaps.

IMG_3345

The Story:
I was told that the original owner ordered this bass from Fender with an ash P-Bass body and a Jazz Bass neck. The previous owner took the bass to a reputable, Fender-licensed shop to have a new identical label placed on the headstock. Before Fender would release the label, the guitar had to be verified to be original, which it was, based on the details and serial numbers present.

I come across intriguing stories like this all the time. I know that back in the day you could call up the factory and order guitars however you wanted them. The major Detroit car makers did the same thing at the same time.

My thing is (I guess it’s a thing? What’s a thing, really?) I can’t really believe these things until I investigate myself. In a lot of cases these dudes don’t want you popping the neck and pickguard off to look at dating codes, so when negotiating a price you have to take that into consideration. I got a great deal on this one so I sprung for it.

The Facts:

Here’s where I turn into Professor Propeller-Head and you’ll have to pay attention to the details.

Around 1976, Fender started what we consider today to be the modern serial number system. It’s pasted on the headstock and the first two characters tell you the year (S7 = 1977, E1 = 1981). This is generally accepted to be the year the guitar was made, and you have little to worry about unless the neck doesn’t match up with the body or other shit like that.

So the guy whom I bought it from claimed it was a 1976. Great. That means the serial number is on the headstock….but wait…he didn’t like how “old” it looked so he did a pro refin job on the headstock, and had the label replaced with one identical. Nothing against this guy- he was nice…but why oh why do people to this?

So here is a pic of the “identical label” that was replaced. Notice anything? The label is actually a label from the early 70’s era (up through 1975).

Early 70's Era Label

Early 70’s Era Label

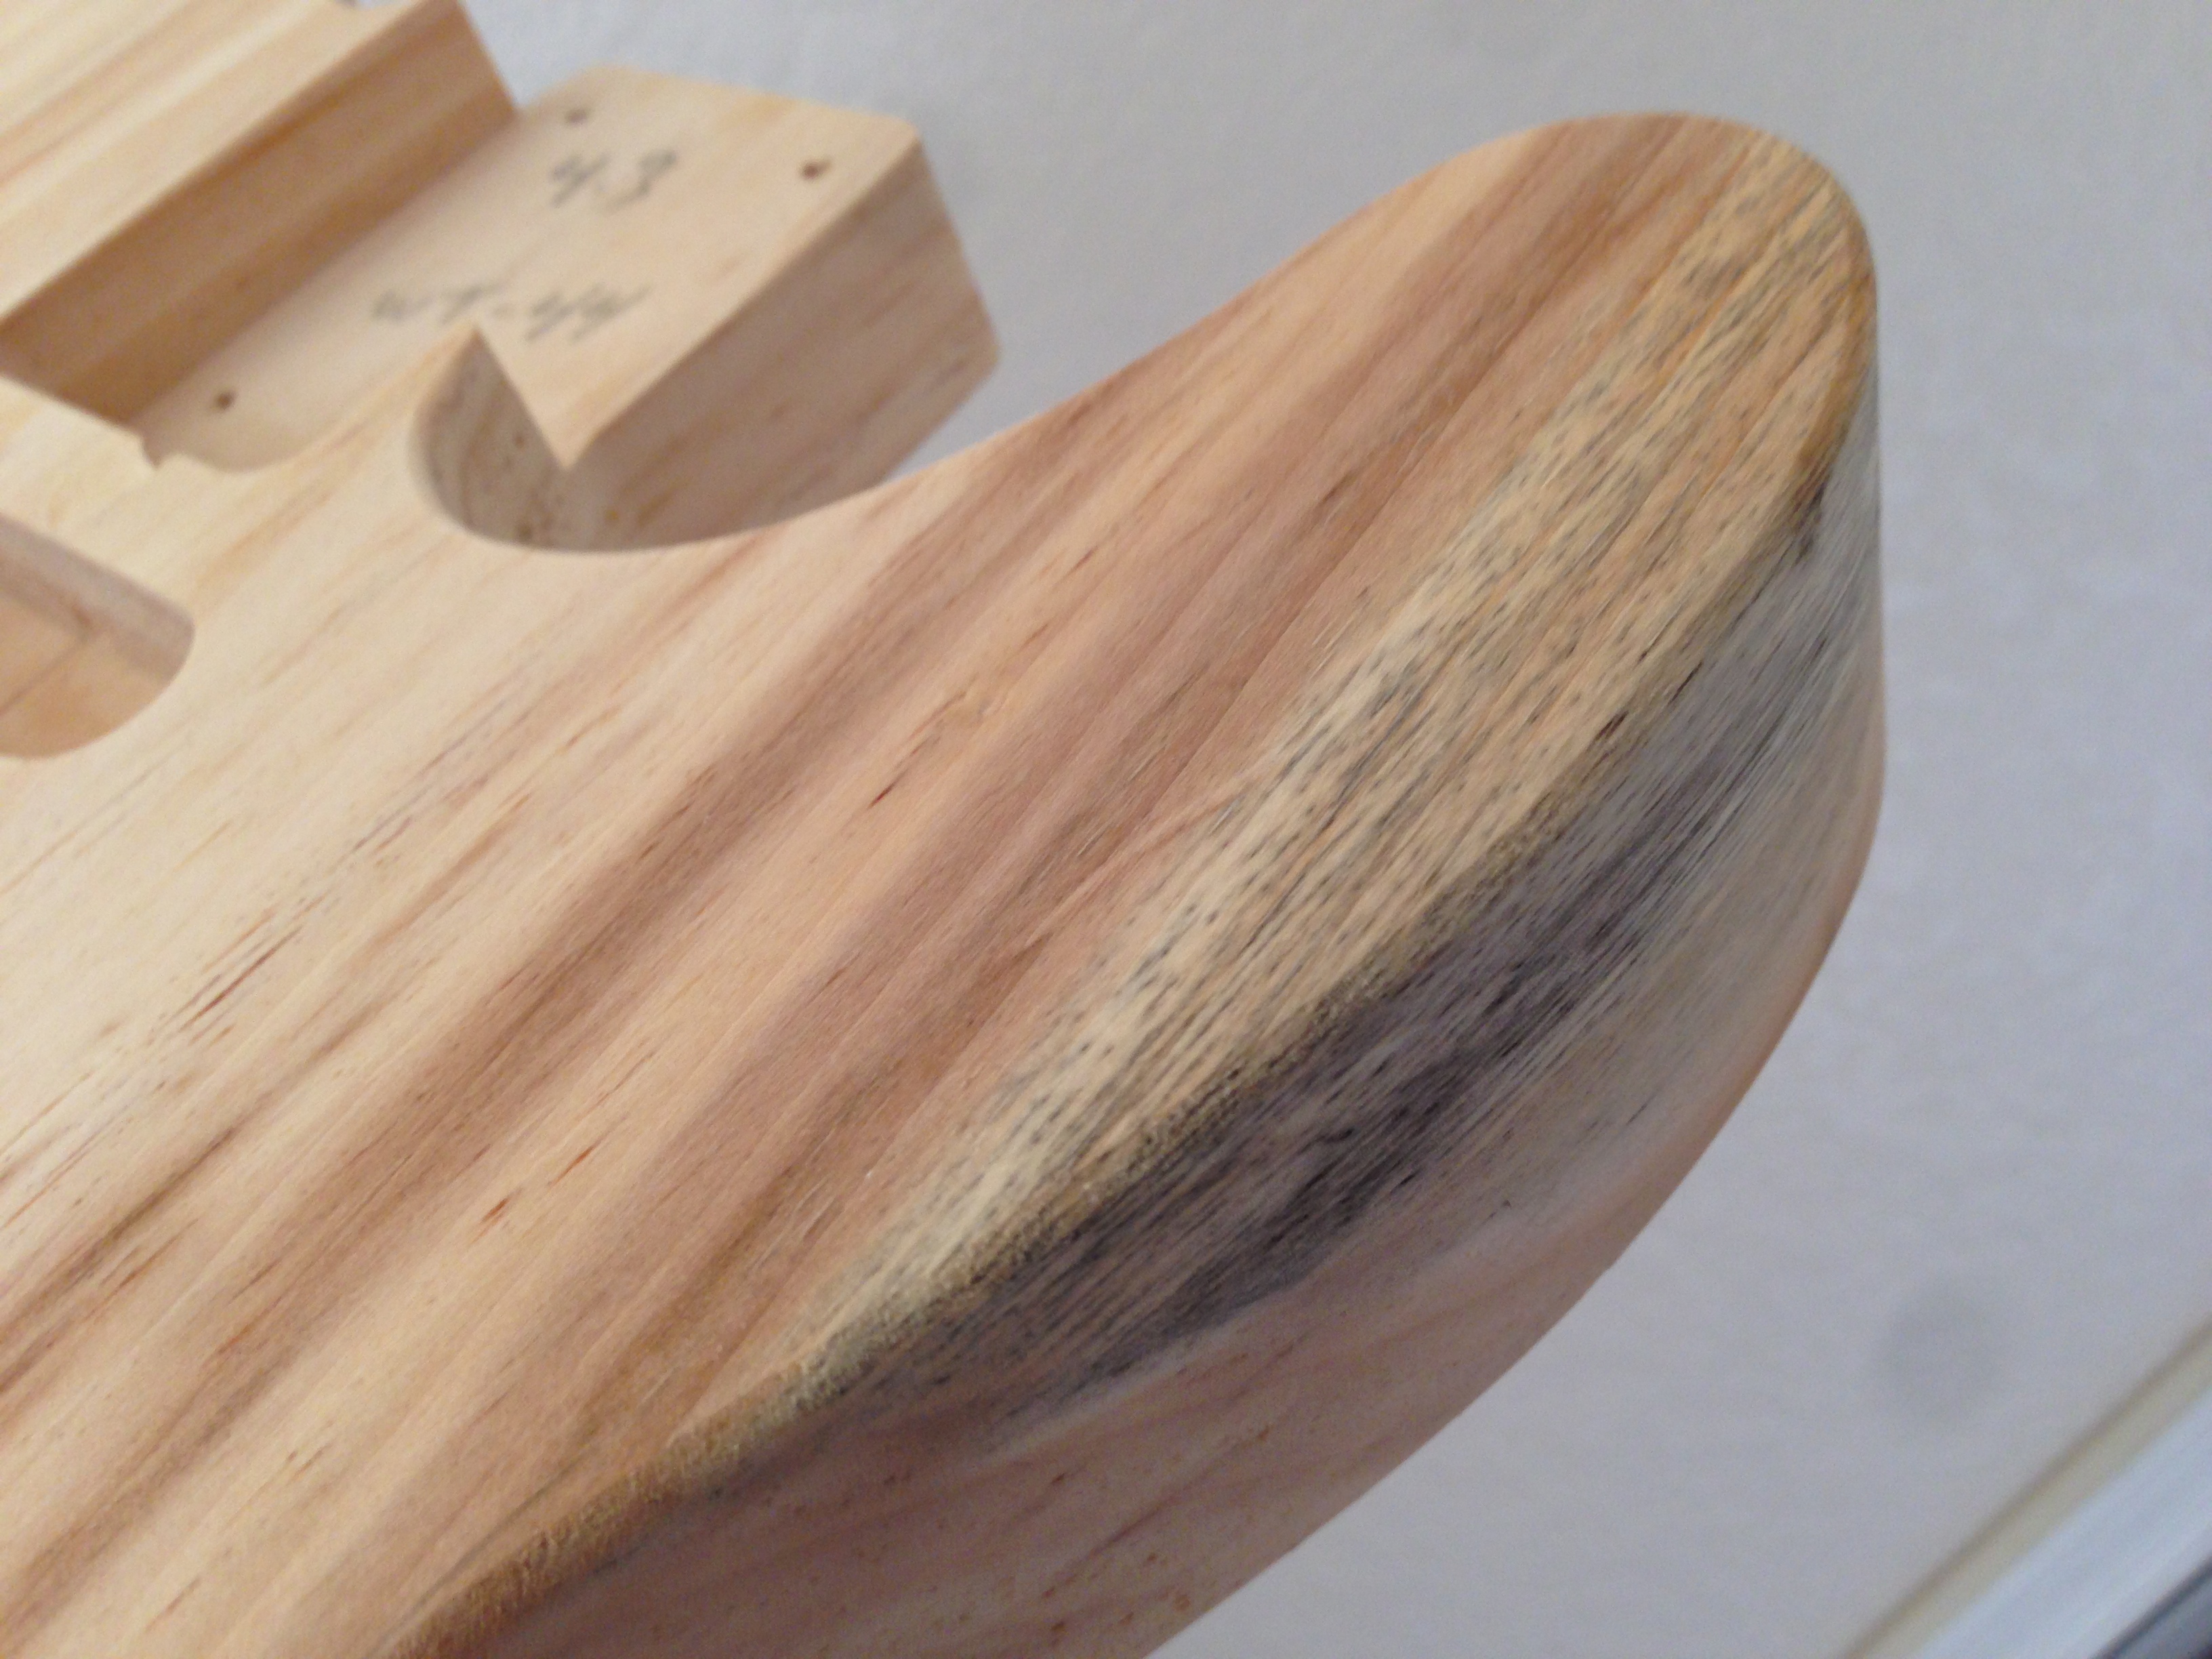
This led me to think that what I had here was not in fact a 76, but likely a 75 or earlier. Time to pop the neck off, and look at the date code on the heel:

IMG_3321

The code on the neck heel reads (from what I can tell) 02011713

Generally this means:
02 – Jazz Bass
01 – Rosewood Fingerboard
17 – Week code
1 – 1971
3 – Wednesday

1971. What the hell?

Here’s where you start banging your head against the wall.

It’s known that sometimes with these Fender neck heel date codes the last two numbers were transposed, so there’s a good possibility that the “3” actually represents 1973. It’s also possible that the numbers are faded enough that I’m reading them wrong. Take a look at the picture.

The neck plate serial number reads 508162, placing the date around 1973, 1974. I’m not a huge fan on relying on a removable part to determine the date of the guitar body, but in this case the date matches up to the era of the neck.

IMG_3339

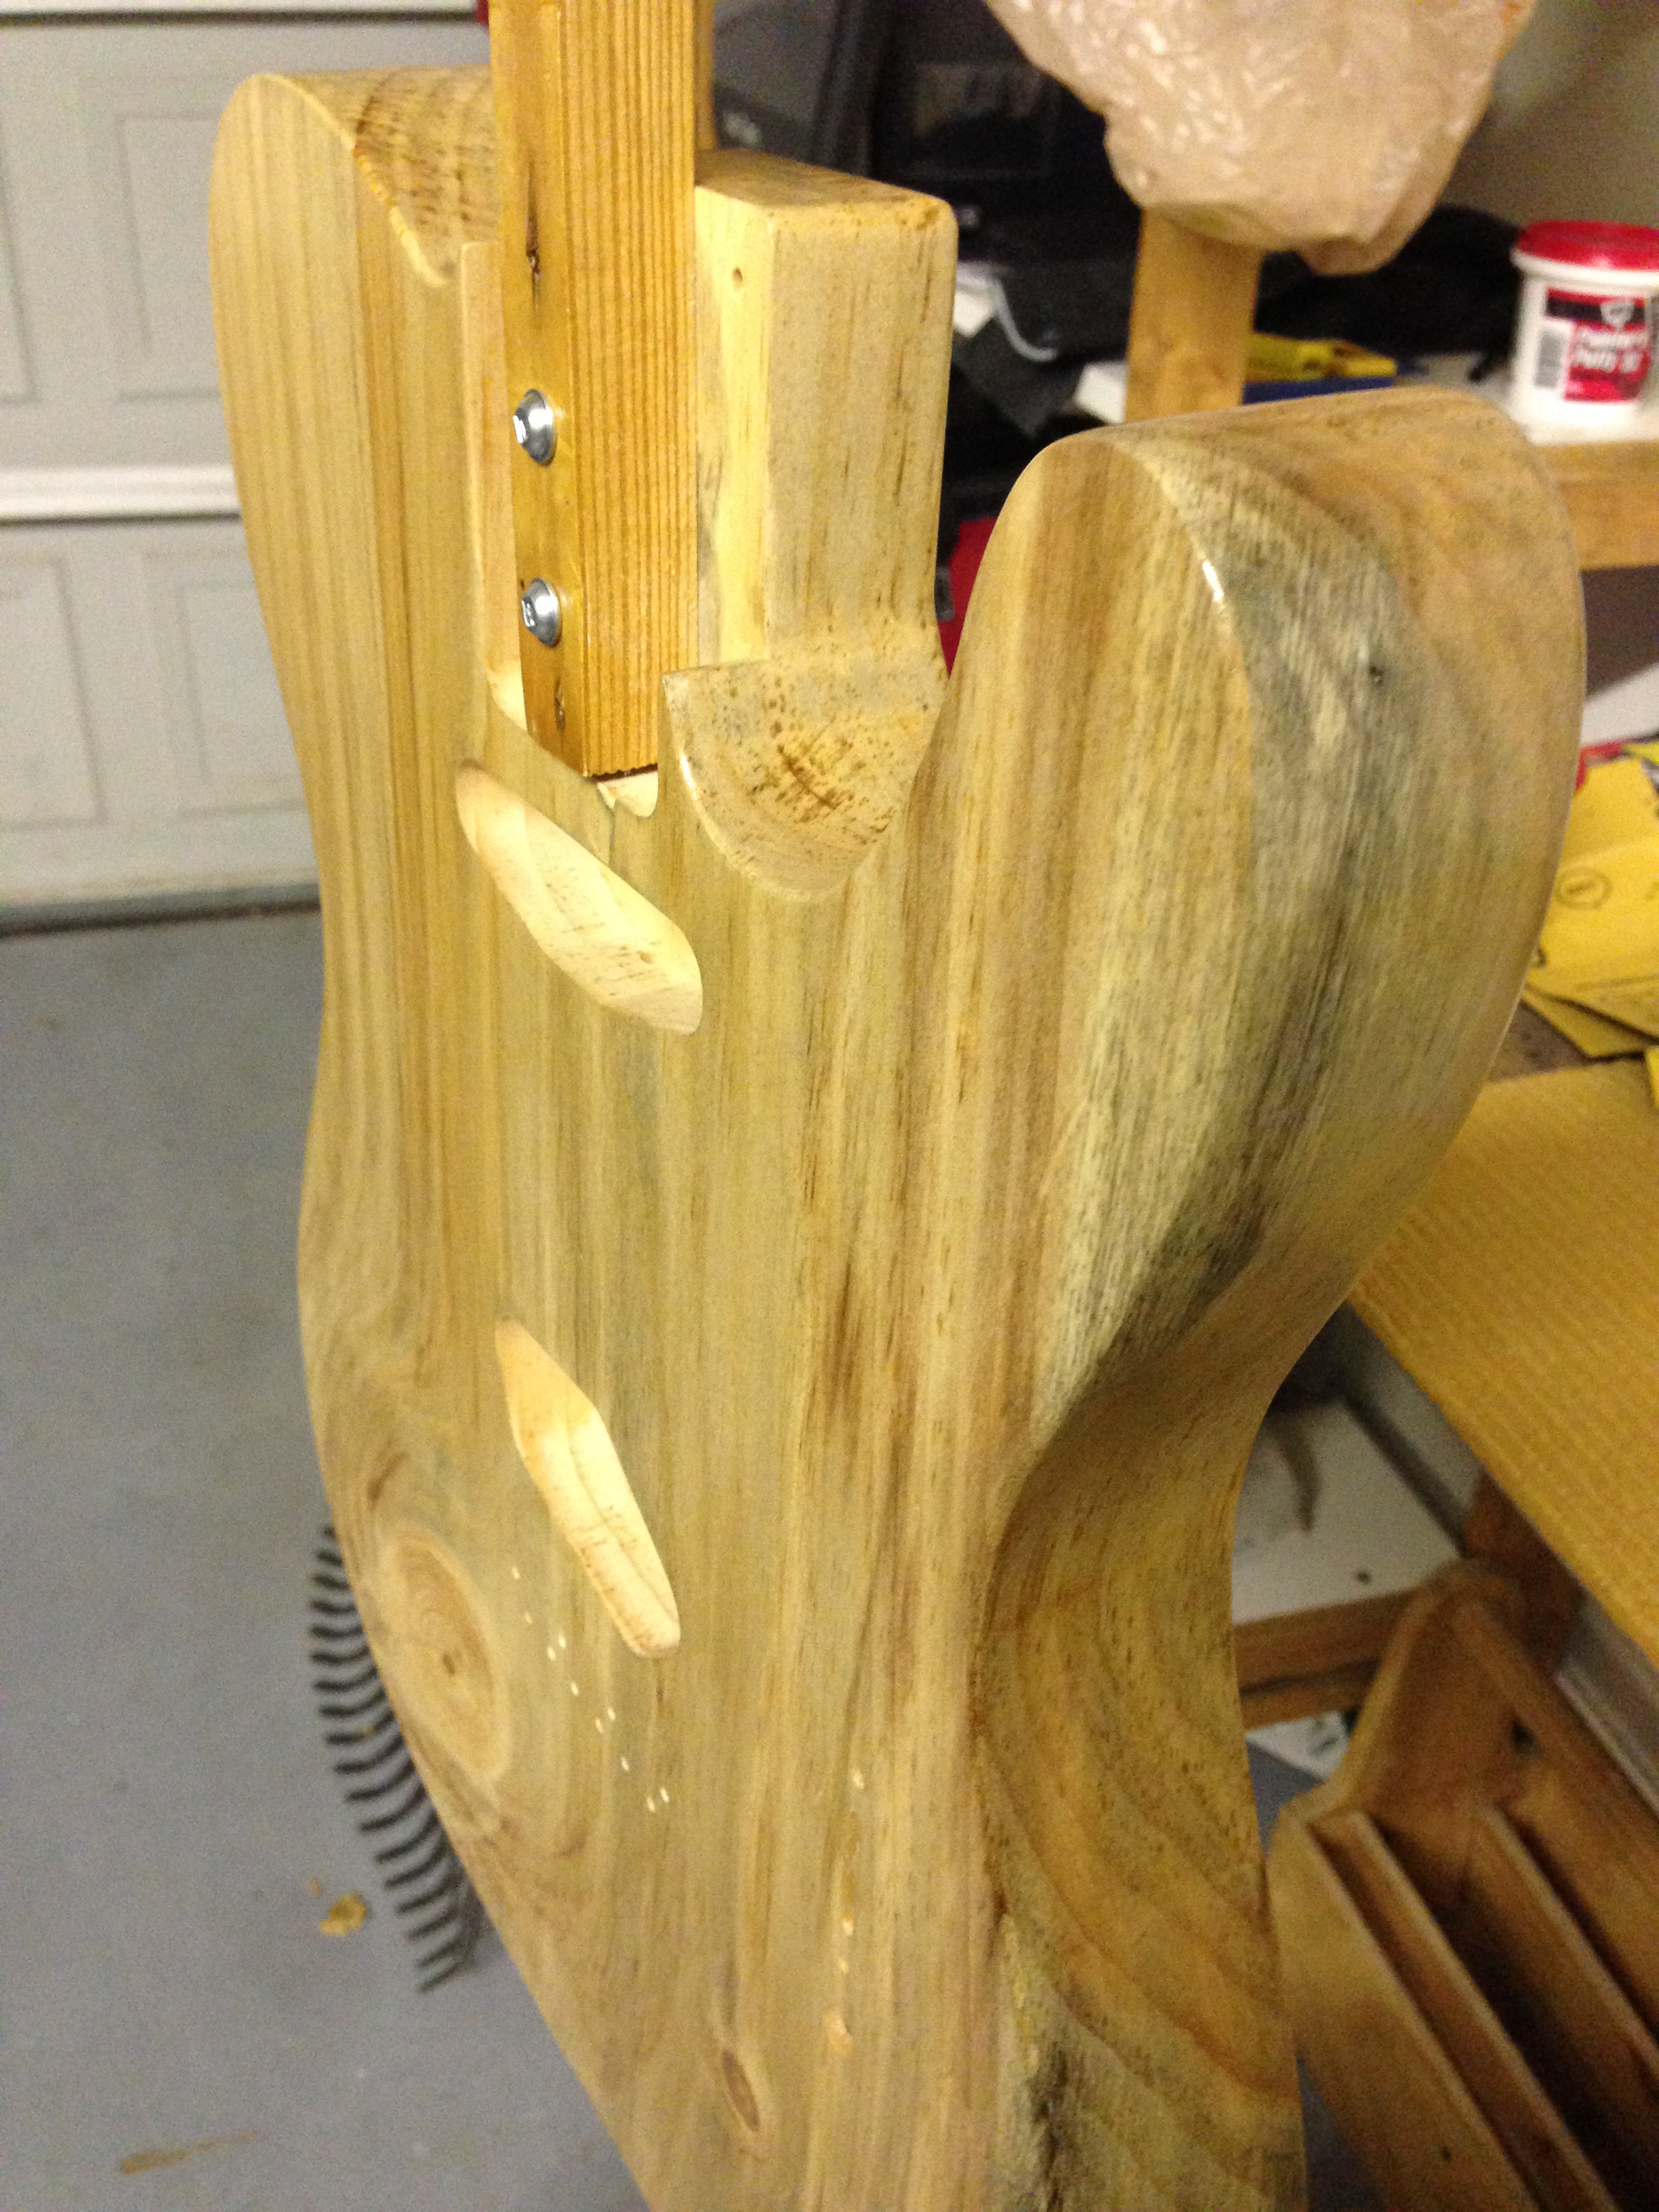
Going a little further, the neck pocket, while not having any date codes to read, does have period-correct quality assurance markings. The name “FRANK” is the name of a dude that worked in the Fender factory and shows up on other period-matching guitars and basses.

IMG_3322

This is a huge hassle, and you might wonder, as I have, why Fender didn’t take better care in providing trackable dates?

Look- the answer is that these guitars were made in a mass-production factory environment. The folks putting them together grabbed parts from boxes, and it wasn’t uncommon to have a year-old neck slapped onto a new body. They worked with what was around. They also didn’t know that there would be nerds like you and me desperately working to curate and determine specific years of manufacture. They simply weren’t in the business of making that clear and traceable.

The bottom line is I could determine with some certainty that this was a body and neck from the same era. For Reverb posting purposes I called it a 1975, but the the fact is I don’t have a clue exactly what year it was assembled and sold.

IMG_3332

Why go through all of this? Well for one I can’t assess the value and place an accurate and fair price until I play this “who-the-hell-are-you” game. The biggest reason though is this is EXACTLY what sellers like me are responsible for. You have to commit to due diligence and make sure people know the full story. The folks I sell to aren’t collectors or high rollers- they’re dudes and ladies like me who don’t make a ton of money, but want and frankly deserve to play cool vintage guitars.

Just call me Ray Zalinsky: I sell guitars to the American working man because that’s who I am and that’s who I care about.

I sold this via my Reverb store to a fellow in Georgia, seemed to really like it. He asked for a copy of the research, and I was happy to comply.

Pine Barncaster Build Part 3

I gotta say, I had a lot of fun doing my first nitro spray. I started by picking up 3 cans of Behlen nitrocellulose musical instrument lacquer online. You really have to order this stuff- no store around the corner is going to carry it.

Nitro!

Nitrocellulose Lacquer was used early on by Fender, Gibson and all the other bastards making guitars back in the 50’s and 60’s. Basically each spray treatment ‘melts’ into the previous layer, forming a kind of crunchy candy shell (think M&M’s) as opposed to polyurethane, where each spray forms it’s own layer (think Gobstoppers).

Anyway- in order to use it, you gotta warm it up in hot tap water. Otherwise it will spatter and fart out big globs (which as it turns out it might do anyway).

Warm it up

Warm it up

The plan I developed was to spray 9-12 coats, 2-3 coats a day, 1-2 hours apart. From what I have read, this allows the layers to melt into each other. I would hold the guitar flat, spraying about 1ft from the body with the can at a slight angle. I started and ended each spray away from the body, doing a cross-hatch pattern on the front and back. Look up Will Kelly on Youtube for more details (I did).

Spray!

Once it cured for about 14 days, I wet-sanded it using 800-2500 grit sandpaper, to get it smooth and shiny. I wet the sandpaper and the body down with a detergent/water mix.  Again, Look up Will Kelly’s videos. They really helped me out.

sandpaper

The end result was absolutely awesome. I love it. Just look at this monster.

Lacquered


Not sure these pics do it justice:

Barncaster 009

I even brought it in the house and put it under sexy lighting to show the ridiculous colors:

Barncaster 011

Close up of the ‘big red spot’

Barncaster 012

Next up, I’m gonna show you how I relic’d all the brand new shiny parts using melt-your-face-acid…so stay tuned…

Barncaster 007


Pine Barncaster Build part 2

Let me start by saying that I know there’s steps you have to take in order to seal in sap so it doesn’t mess with stain or paint. I’m not going to do that. I simply don’t care. Is this a mistake? Yeah probably. But, in the end I’m building it for myself as my Merle Travis machine, so as long as it doesn’t explode, I don’t care about discoloration or whatever.

Barncaster

That being said, I do care about how the guitar looks overall, and am critically concerned as to how I would like to stain it. I already decided it will get a clear coat of nitrocellulose lacquer, so picking out the stain will be critical. What I am interested in is enhancing all of the natural colors and features, while, if possible, making it “pop” even more.

One option is going with a kind of driftwood, bleached-out effect, which should pronounce the dark coloring more heavily. To get this, I mixed ebony and natural stain together at a 1:6 ration (respectively). Here’s a pic of the little stain guys and my bigger mixing bucket:

Stain

The result on my pine test board is pretty great, as the mixture really penetrates the grain brings out the hidden features well:

Ebony/natural 1:6 ratio

The other option I landed on is just going with a straight natural stain. I did this for my first guitar build, and it adds a slight “yellowing” to the grain. While it overall darkens the pine, it doesn’t necessarily show any kind of hidden details:

Natural stain

So after much hem-hawing, pissing and moaning I decided to go with CT’s advice, and apply the 1/6 ebony/natural mix. Here’s the results:

Barncaster fully stained front

This worked perfectly, as the ebony really penetrated all the cracks and imperfections, and even brought out a few features that were otherwise invisible.

Barncaster side stained

I’m also glad that this mix didn’t mask the dark features.

Barncaster back stained

When we were living back in St. Louis, it would literally take at least 7-10 days for stain to fully penetrate my guitar bodies, given the heavy mid-west humidity. Here in Arizona that process cuts down to about 2-3 days, which is awesome.

Part 3 will cover my first attempt at a nitrocellulose spray lacquer finish. Wish me luck…

Nitro

Pine Barncaster Build part 1

Moving 1500 miles cross country has proved tough for CT and myself, what with leaving family and friends, starting new jobs, and learning to live in a place that seems to be trying to kill you for several months out of the year.

So….guess what….I chose to reward myself with a new guitar building project! As of late, I have been fascinated with the recent revival of pinewood guitar bodies. Bill Kirchen (think “Hot Rod Lincoln”) recently posted an interview on YouTube, showing off his pine telecaster built by Carmine Street Guitars in New York. The sound and look absolutely killed me. Carmine Street actually builds these guitars out of 200 year old pine lumber, reclaimed from New York city buildings. I certainly can’t think of a better way to recycle.

When I hit Ebay looking for a body, it became clear to me that I needed to make a choice- do I get a piece of perfectly figured wood, or find something with more personality? I decided to go with a body filled with knots, worm holes and discoloration. A Barncaster.

Barncaster body front

So I picked this body up off Ebay from a very reputable builder. When it arrived, I was nearly speechless. Painfully cool. The colors are simply unbelievable. If you hold it up to the light, the corners glow amber from the un-cured sap.

Barncaster body side

Check out the blue/green coloring, and the details of the fibers.

Barncaster colors

The spot that you see is an almost translucent, hard sap

This spot is almost pure sap!

This spot is almost pure sap!

The character continues on the back of the guitar. Notice the rear-loading cavity.

Barncaster back

This guitar is absolutely gorgeous to me. I am a true believer that it’s our imperfections and limitations that make us unique and interesting, and that same thing can be said for guitars, or really anything we choose to create. Follow me unto the desert and join me in the worship of cactus as we await the spaceships.

For the past few days, I have been sanding this sucker down, starting with 220 grit, and ending up with 400 grit for finishing. I even bought a can of compressed air to blow the sanding dust out of all the cracks and worm holes.

Stay tuned for part 2, where I struggle with what stain to use, and make my first attempt at a nitrocellulose lacquer spray-finish!


News of (a very small corner of) the world (small updates)

Hi Everyone.  All 5 of you.  So much love for reading my little corner of the world.  I thought I would take this Feisty Friday (what we call it at work!) and update you all on the goings-on at Living Analog.

First things first.  My husband is a lot of amazing things and one of them is amazingly creative.  He just finished up recording a new song (that he wrote).  It boggles my mind that this person I live with CAN WRITE A WHOLE SONG.  And sing it, and play all the instruments that goes into it.  He’s not a one man army, he gets a lot of input from his band mates.  So if you have any inclination and because I don’t have the capacity right now to figure out how to upload this thing, check out his band blog at www.grandbeautymusic.com.  The song is called “You Go Blind”.

I mean, how can you not love a guy who can write music and who hangs out with his dog, making sure no marauding kitty-cats come and invade their territory?

JT AND MONKEY

Next up: Cameron.  Cam the Man, foster dog extraordinaire is still hanging out at Living Analog.  We’ve taken him to be famous on TV (featured on KSDK’s Sammy’s Stars) and countless adoption events.  Last week my sister and I took him to see Roman Holiday on Art Hill.  He was a perfect gentleman and charmed all the ladies in line for LuLu’s Food Truck and then settled in and watched the movie as quiet as a little mouse.  He’s come out of his shell so much in the few months he’s been back in our house and I really, really, really want him to find a forever home soon so they can enjoy this goofy love of a dog.  Unfortunately most people are really charmed by him and then put off by his age.  Any suggestions you guys have on this matter would be greatly appreciated.  I’m kind of at a loss as to what to do — so this weekend we’ll be at the Sunday adoption event at Local Harvest in Kirkwood if anyone wants to meet the Silver Fox.

CAMERON AT ART HILL

And last but not least — a new project!  There is a room at the back of our house, directly off the kitchen that I have never, ever showed on our floor plan.  Kind of like it doesn’t exist.  But it does.  And it’s crazy town in there.  So when Apartment Therapy started posting about the August Style Cure, I thought it might be a good kick in the rear to sign up and get our back porch back on track once and for all.

It’s bad.

BACK PORCH

Which means it can only get better from here!

The first assignment for the Style Cure was a sort-of style diagnostic.  JT and I both took one.  It was kind of hard!  It’s not everyday you sit down and pin point exactly what it is you like and why you like it.

Image

Image

JT decided my style is “British and fancy”.  I hit back with his style being “Nerdy and fancy”.  The main take-away is that at the end of the day we both prefer quality over quantity and want a relaxing, inviting space. So that’s what we’ll be working on for the next month.  Anyone else doing the Style Cure?  Have a great weekend regardless!  Cheers – CT

JT’s Pigonse G40V Hot-Rod, Part 1!

I have a Pignose G40V I bought new a few years back and have since loved it’s simplicity and durability. Due to it’s portability, and the size of the venues Grand Beauty generally plays, this amp has seen a lot of action, mic’d through our PA. I won’t claim to know the official pedigree, but it supposedly was designed by someone who had something to do with the original Fender Bassman amplifiers. This sucker is tiny, with only a 10-inch speaker, and packs a massive 40-watt punch!

Pignose G40V
Pignose G40V

Being as cool as it is, I simply can’t leave it alone. Why? Well, it’s equipped with all Chinese parts. Don’t get me wrong- the Chinese are fine people- awesome food, impressive culture. Not necessarily the best folks to be mass-producing tone, though.

Vintage Jensen 10 inch speaker

Step number 1 was finding an awesome speaker. CT and I happened on the Midwest Musicians Swap Meet in Saint Louis, where I found a great vintage Jensen 60’s 10-inch speaker in new housing. I also came across a couple of Soviet-era Sovtek 12AX7WB pre-amp tubes (to be seen in part 2).

Testing polarity with D-Cell battery

Once I got the Jensen home, I had to figure out which terminal was positive, as neither one was marked. I used an old trick, where you electrical-tape both the positive and negative ends of a D-Cell (or 9-volt) battery with wire, and then connect to each wire to a terminal. When the speaker “sucks in” on connection, you have negative polarity. Reverse the wires, and you should see a “push out” of the speaker on connection. This will be your positive polarity, and you can now mark on the casing the + and – terminals, and connect it to your amplifier.

Jensen speaker mounted in the Pignose

The mounting holes lined up great, and connections were secured. Success! Now my Pignose has a vintage Jensen speaker, rather than the cheap Chinese stock that it came with. Stay tuned for part 2, where I attempt to replace and bias the existing Chinese tubes with Soviet-era, mean-ass Sovteks!