Category Archives: Living Room

The next living room change is …

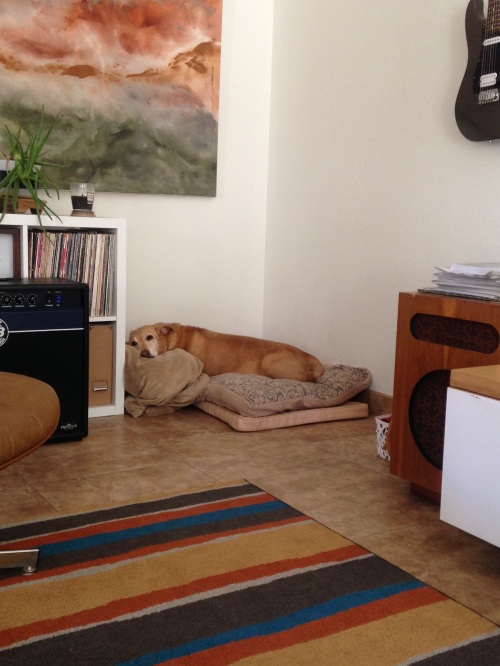
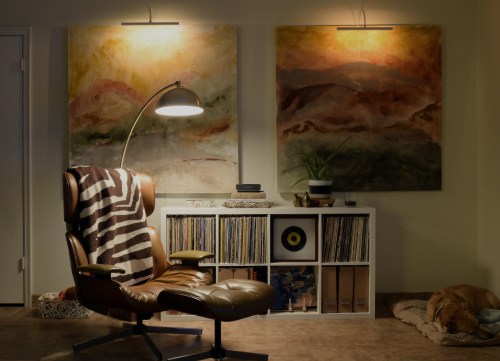
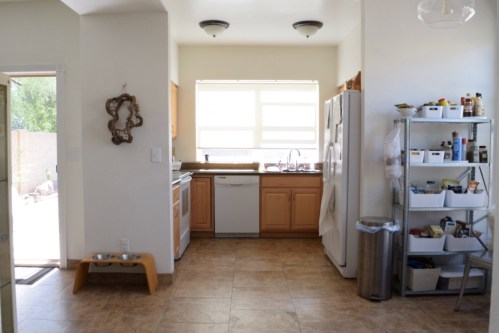
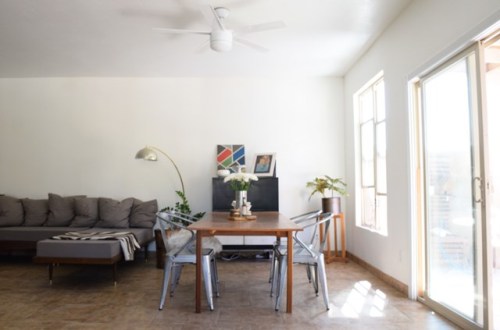
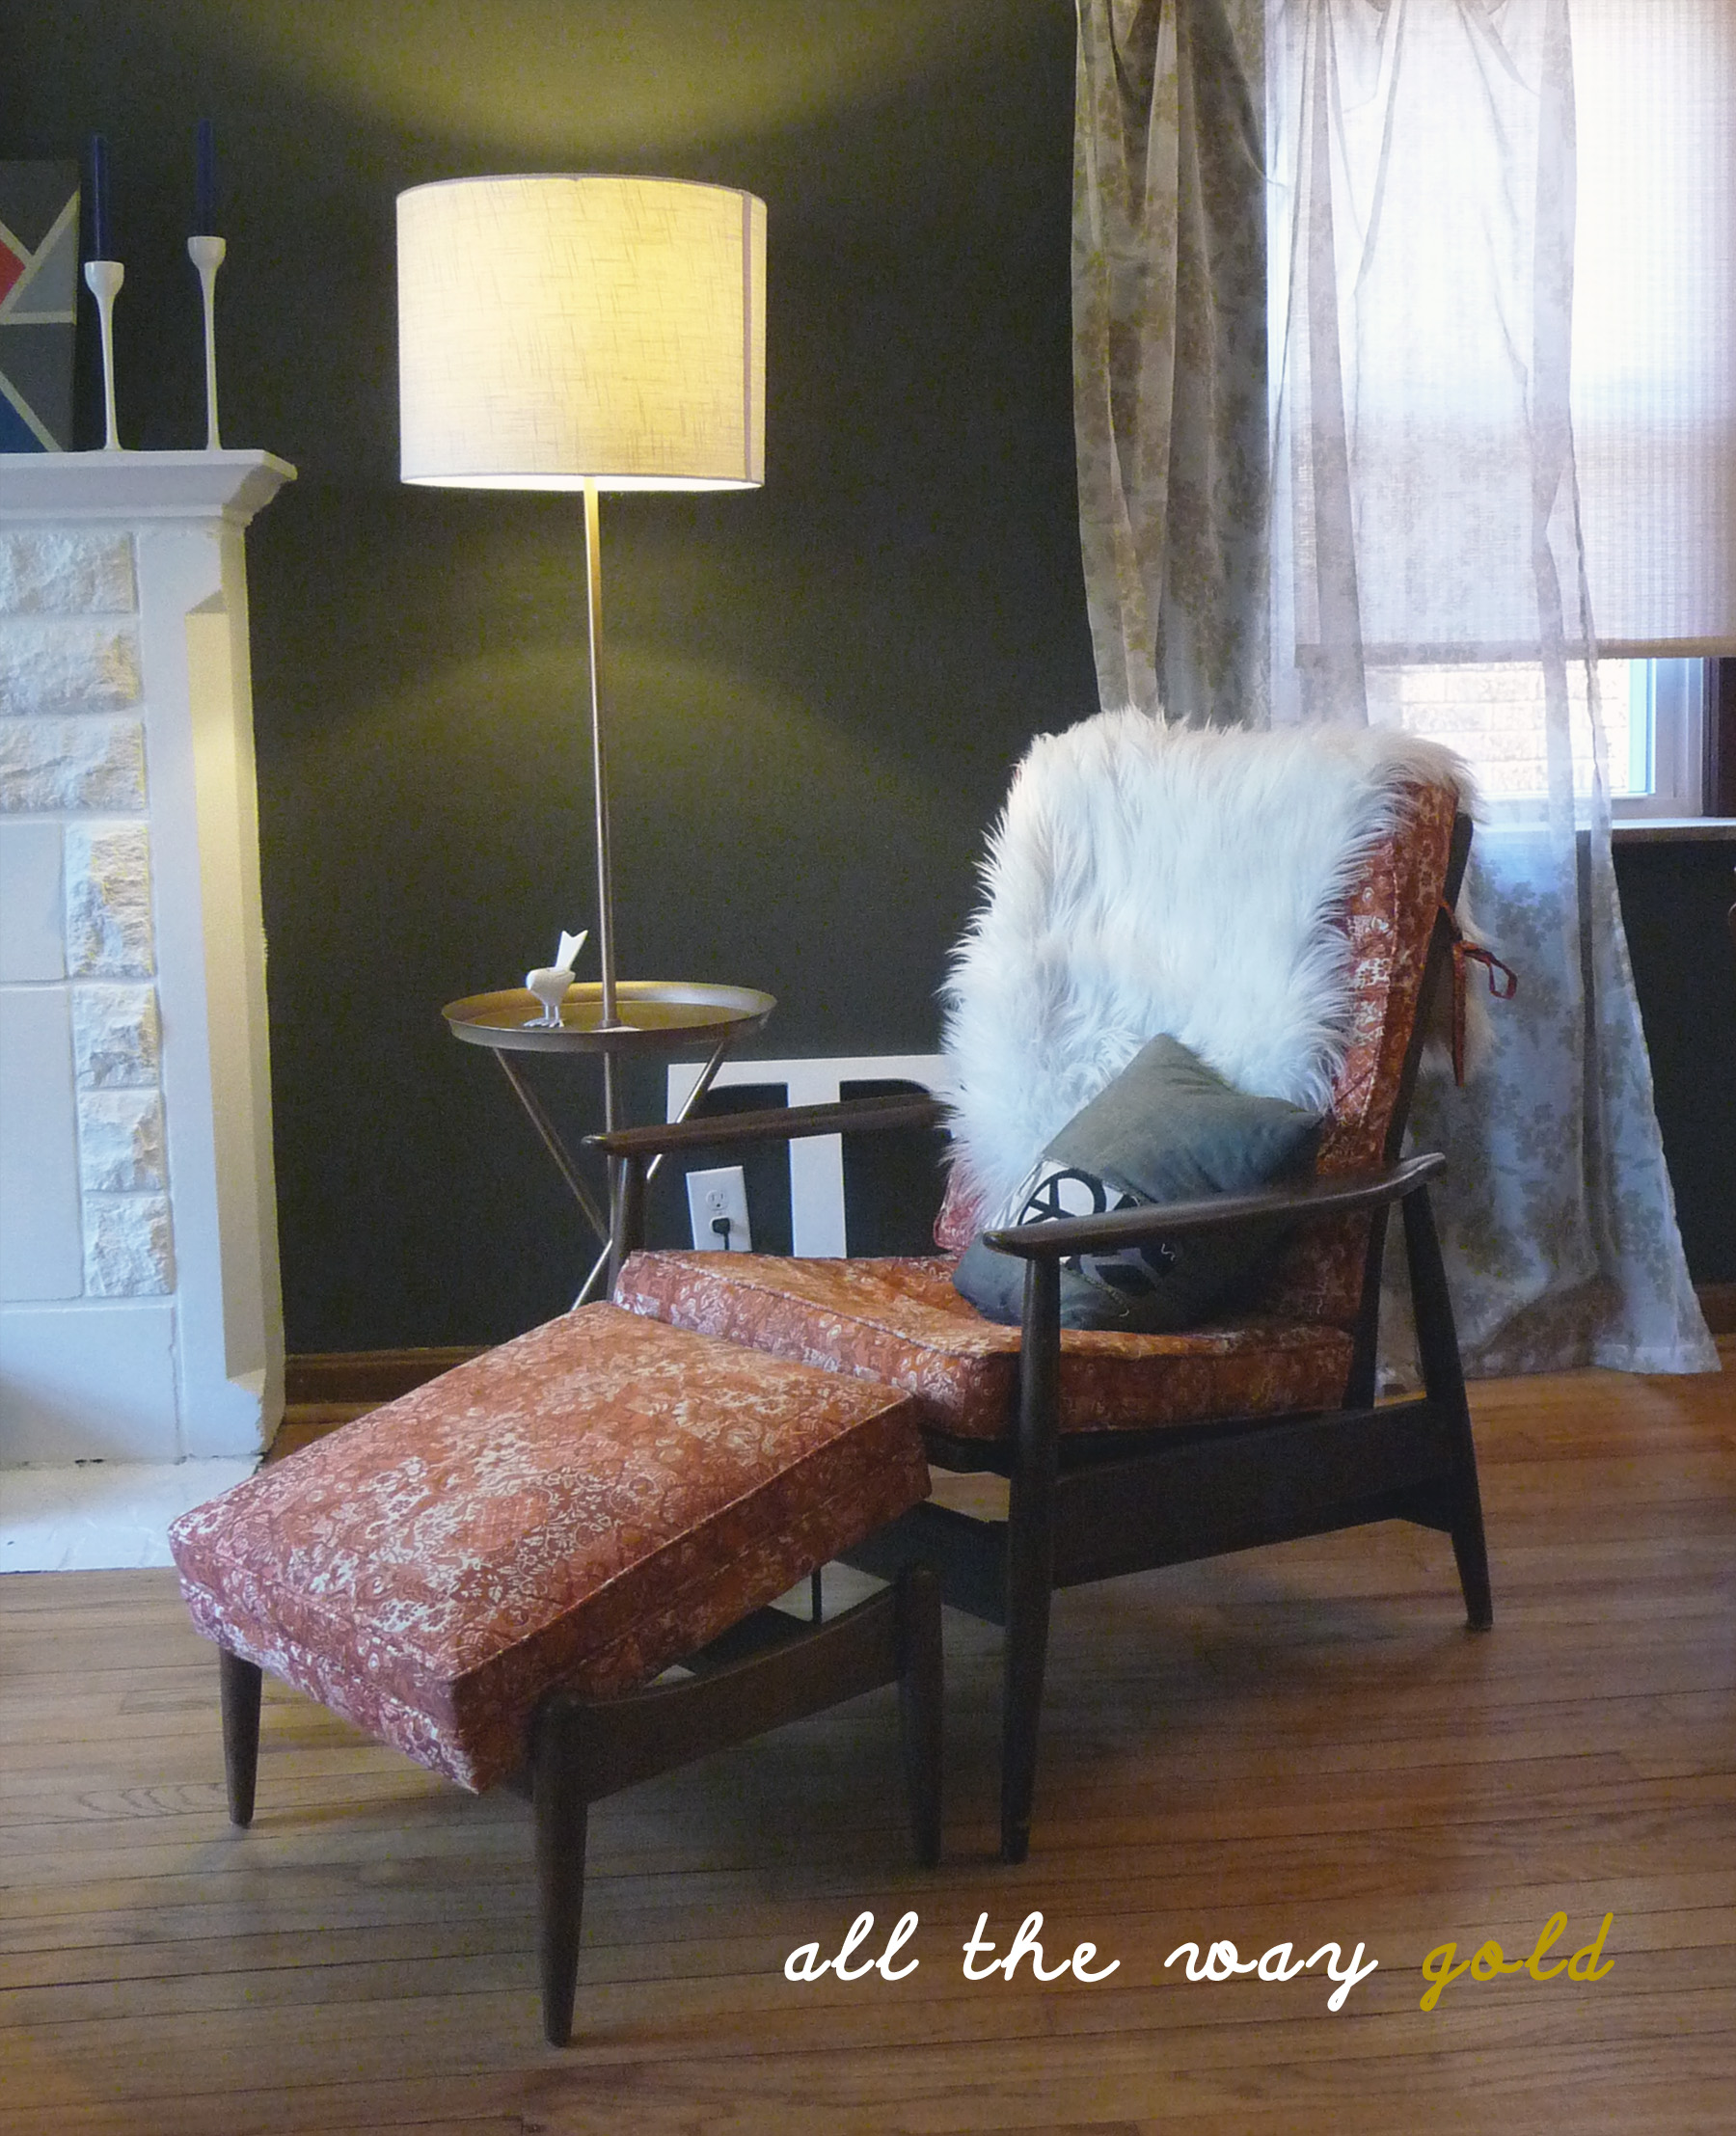
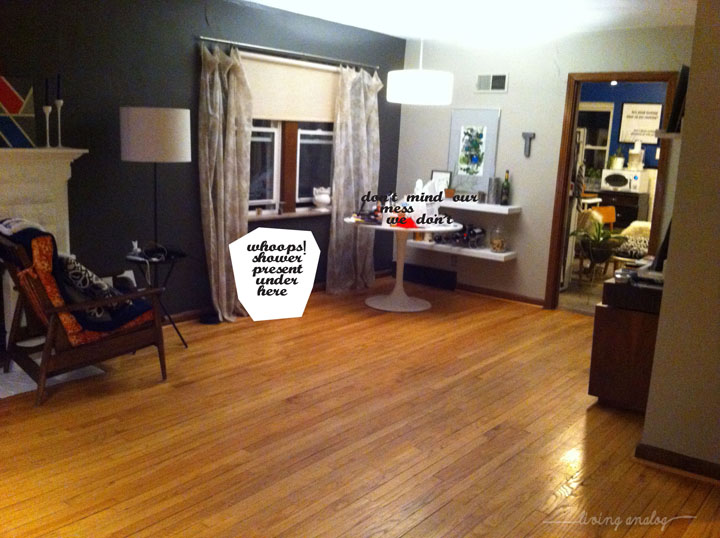
As I mentioned in the last post, I foresee some changes happening to this room as it has started evolving more rapidly since the addition of the area rug.  The paintings are still safe for now but JT and I have discussed a re-do. (He’s on board, gotta love that guy.)   Instead we had an out-of-the-blue, spur-of-the-moment, why-the-hell-not ottoman makeover project on our long Labor Day weekend.

It started a while ago, when we got the new sofa.  We’ve been loving this thing and basically live on it (I’m typing from there right now).  We thought an upholstered ottoman might be more comfortable than the Ikea Strind for general lounging about – the Strind has two large glass panels that have somehow survived two moves but did take out JT’s smartphone once – and on a half-off Saturday at Goodwill we came across the perfect candidate. Will you look at that, it actually fit perfectly into the truck.  (Can you tell we’re kind of in love with our truck?  #trucknerds)

IMG_6580

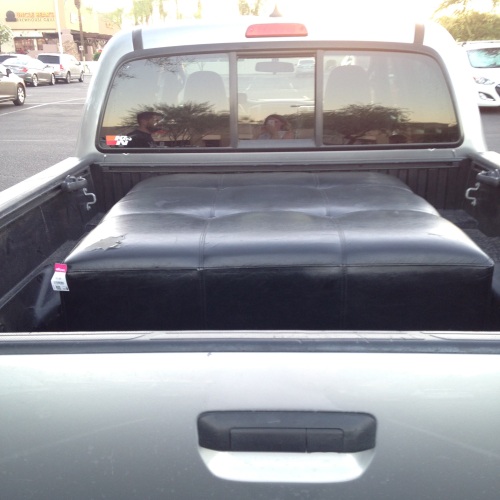
If your eagle eyes can read that Goodwill tag on the ragged corner of this bonded-leather beauty, you are correct that it says $5.99.  And don’t forget – it was half off day!  So this ottoman only cost $3.00!  Not quite because we still had to purchase fabric as I wasn’t keeping it in THIS condition but not too shabby.

While we still had “the thing” penned up in the back of the truck and airing out from the eau-de-Goodwill, we stopped by Joann for the next purchase.  JT was definitely the only man in the store and he marveled at the size and quantity (and need for) so much crafting stuff.  Or maybe he was more perplexed than marveling.  Your call.

IMG_6607

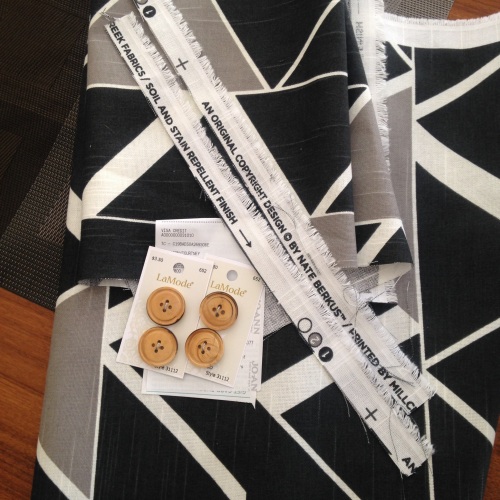
We found this great Nate Berkus fabric that should have been $45 for our three yards but we scored for $22.50 thanks to a major Labor Day sale.  So let’s bring our ottoman price up to $25.50 and call it good.  I also bought the buttons shown in the picture above but decided once I had the thing upholstered that I didn’t want them.

Then began the disassembly process.  JT tackled the much-abused base with some Restor-A-Finish we had on hand from the Danish Daybeds.  I removed a percentage of the staples (especially around the corners where I knew we would need to be adding more staples back in) and the black tack fabric to remove some bulk.  We left the bonded leather in place and cut the tufting buttons free from the inside of the frame.  The fabric cutting and sewing process did not get photo documentation but took the span of about five Friends episodes and ended with a locked up sewing machine about one inch from the end of the last seam.  I need to take the machine in to get oiled and serviced, it’s probably about time.

Once the bottomless cube was (imperfectly) sewn up (and please note I was careful to choose a fabric that would disguise my low seamstress skills), it was time to stretch that baby onto the (heavily Febreezed with my own homemade concoction of vodka, vinegar and lavender essential oil) base!  We used our trusty Stanley staple gun with 3/8″ staples and pounded in any stragglers with a hammer.  The staples didn’t have any trouble going through both our new upholstery and the bonded leather (or vinyl?) so I’m glad we didn’t go to the pain of removing the original material.  I included the last picture above to highlight JT’s drill bit extender – this has come in really handy when you need to attach screws in a deep pocket like this frame had.

And the afters!  We’re loving it and definitely changing out our paintings to get rid of the mossy greens and clay colors.  And that wet bar … I’ve got my eye on that catch-all-junk, 80s eyesore of a wet bar.

IMG_6614

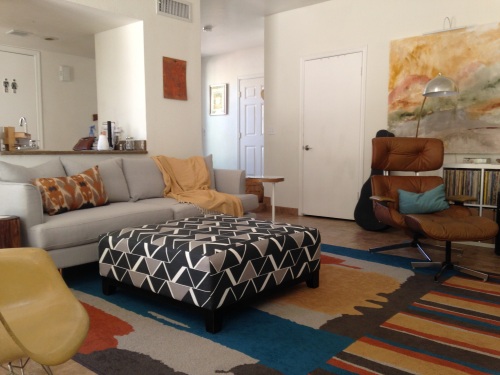
There’s starting to be a lot of pattern going on in this room and we considered going with a milder ottoman fabric but we figured for the price we might as well “go bold or go home” as they say.

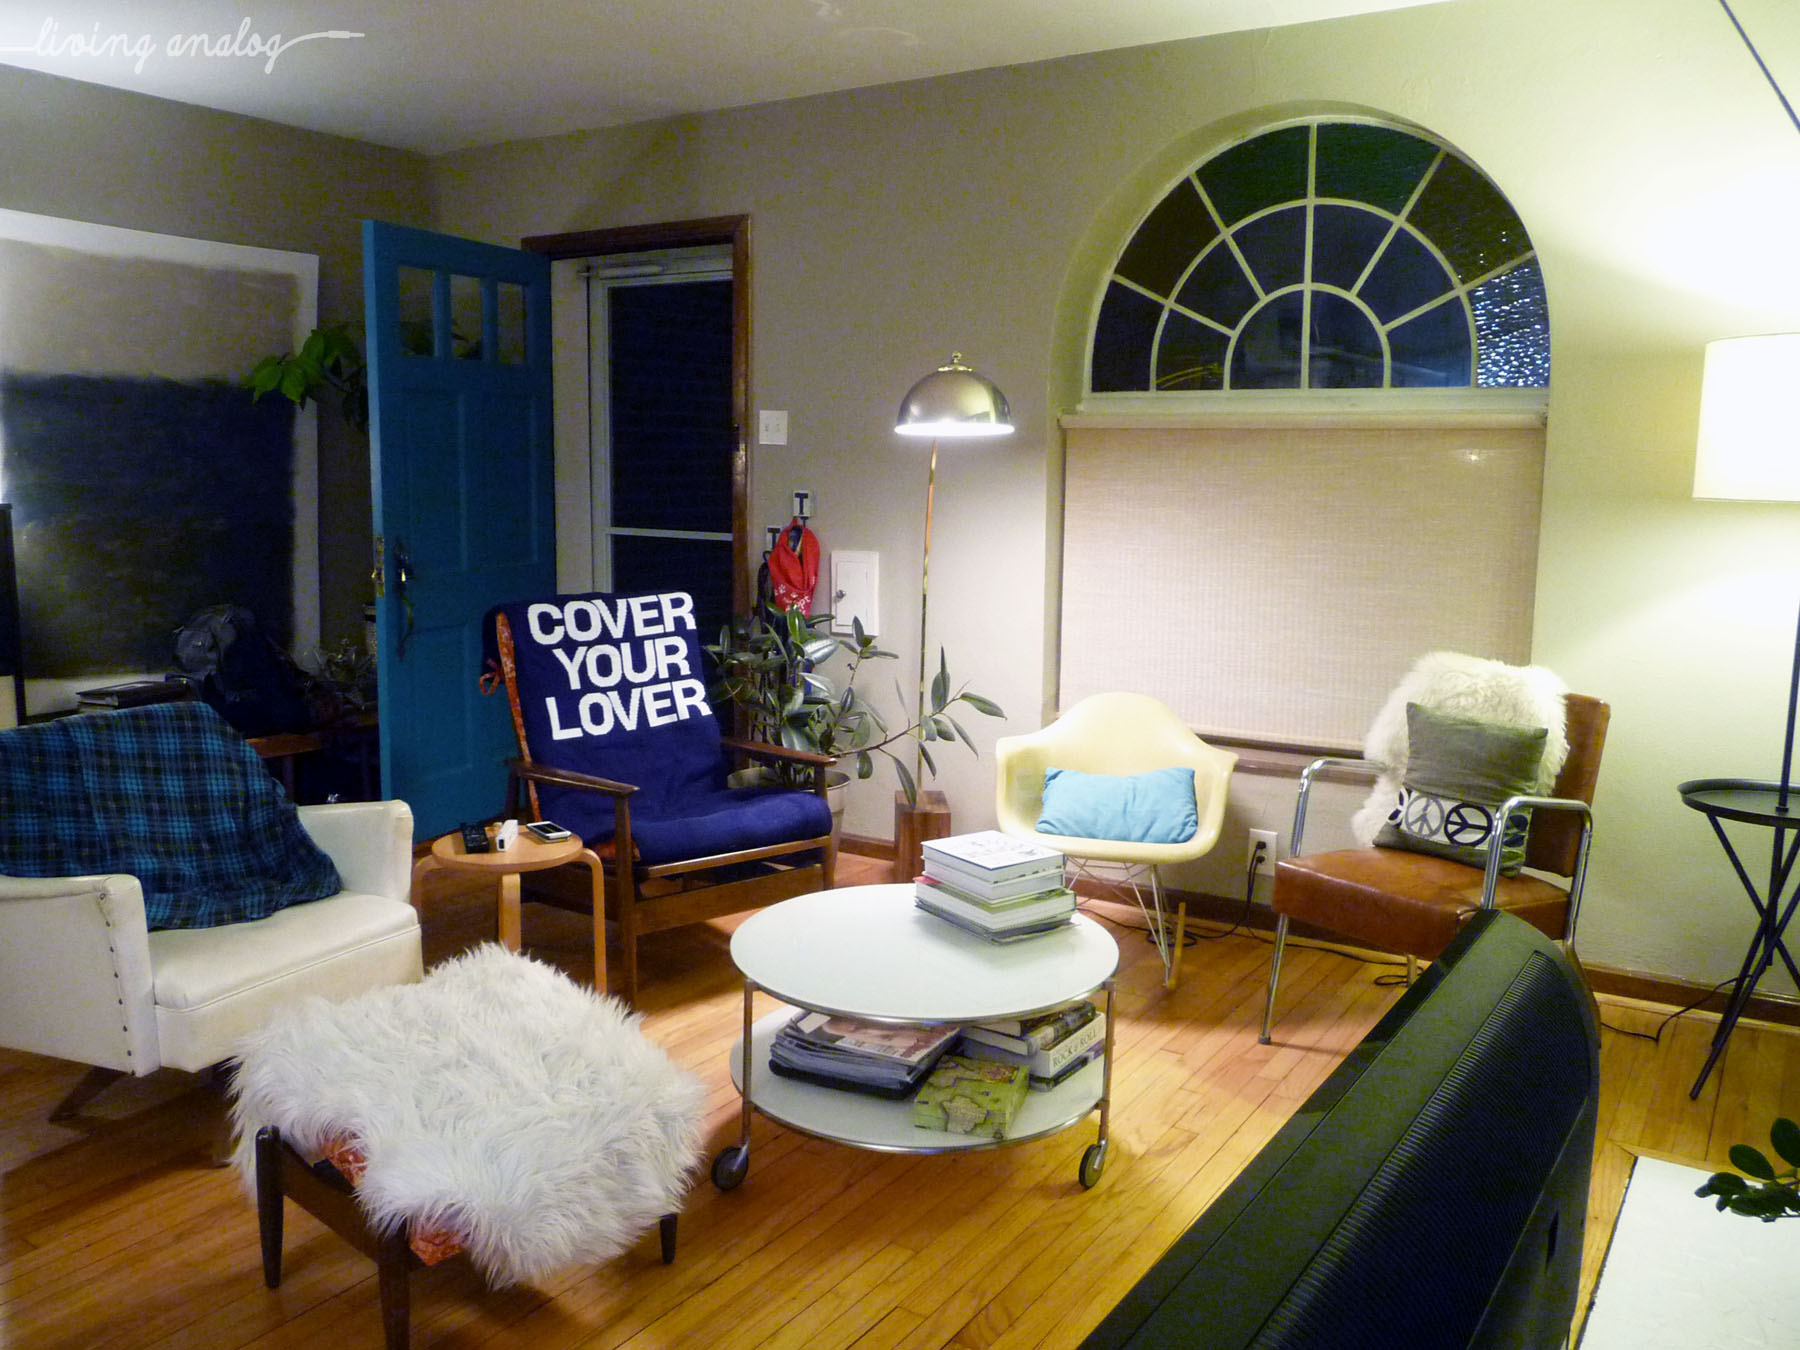
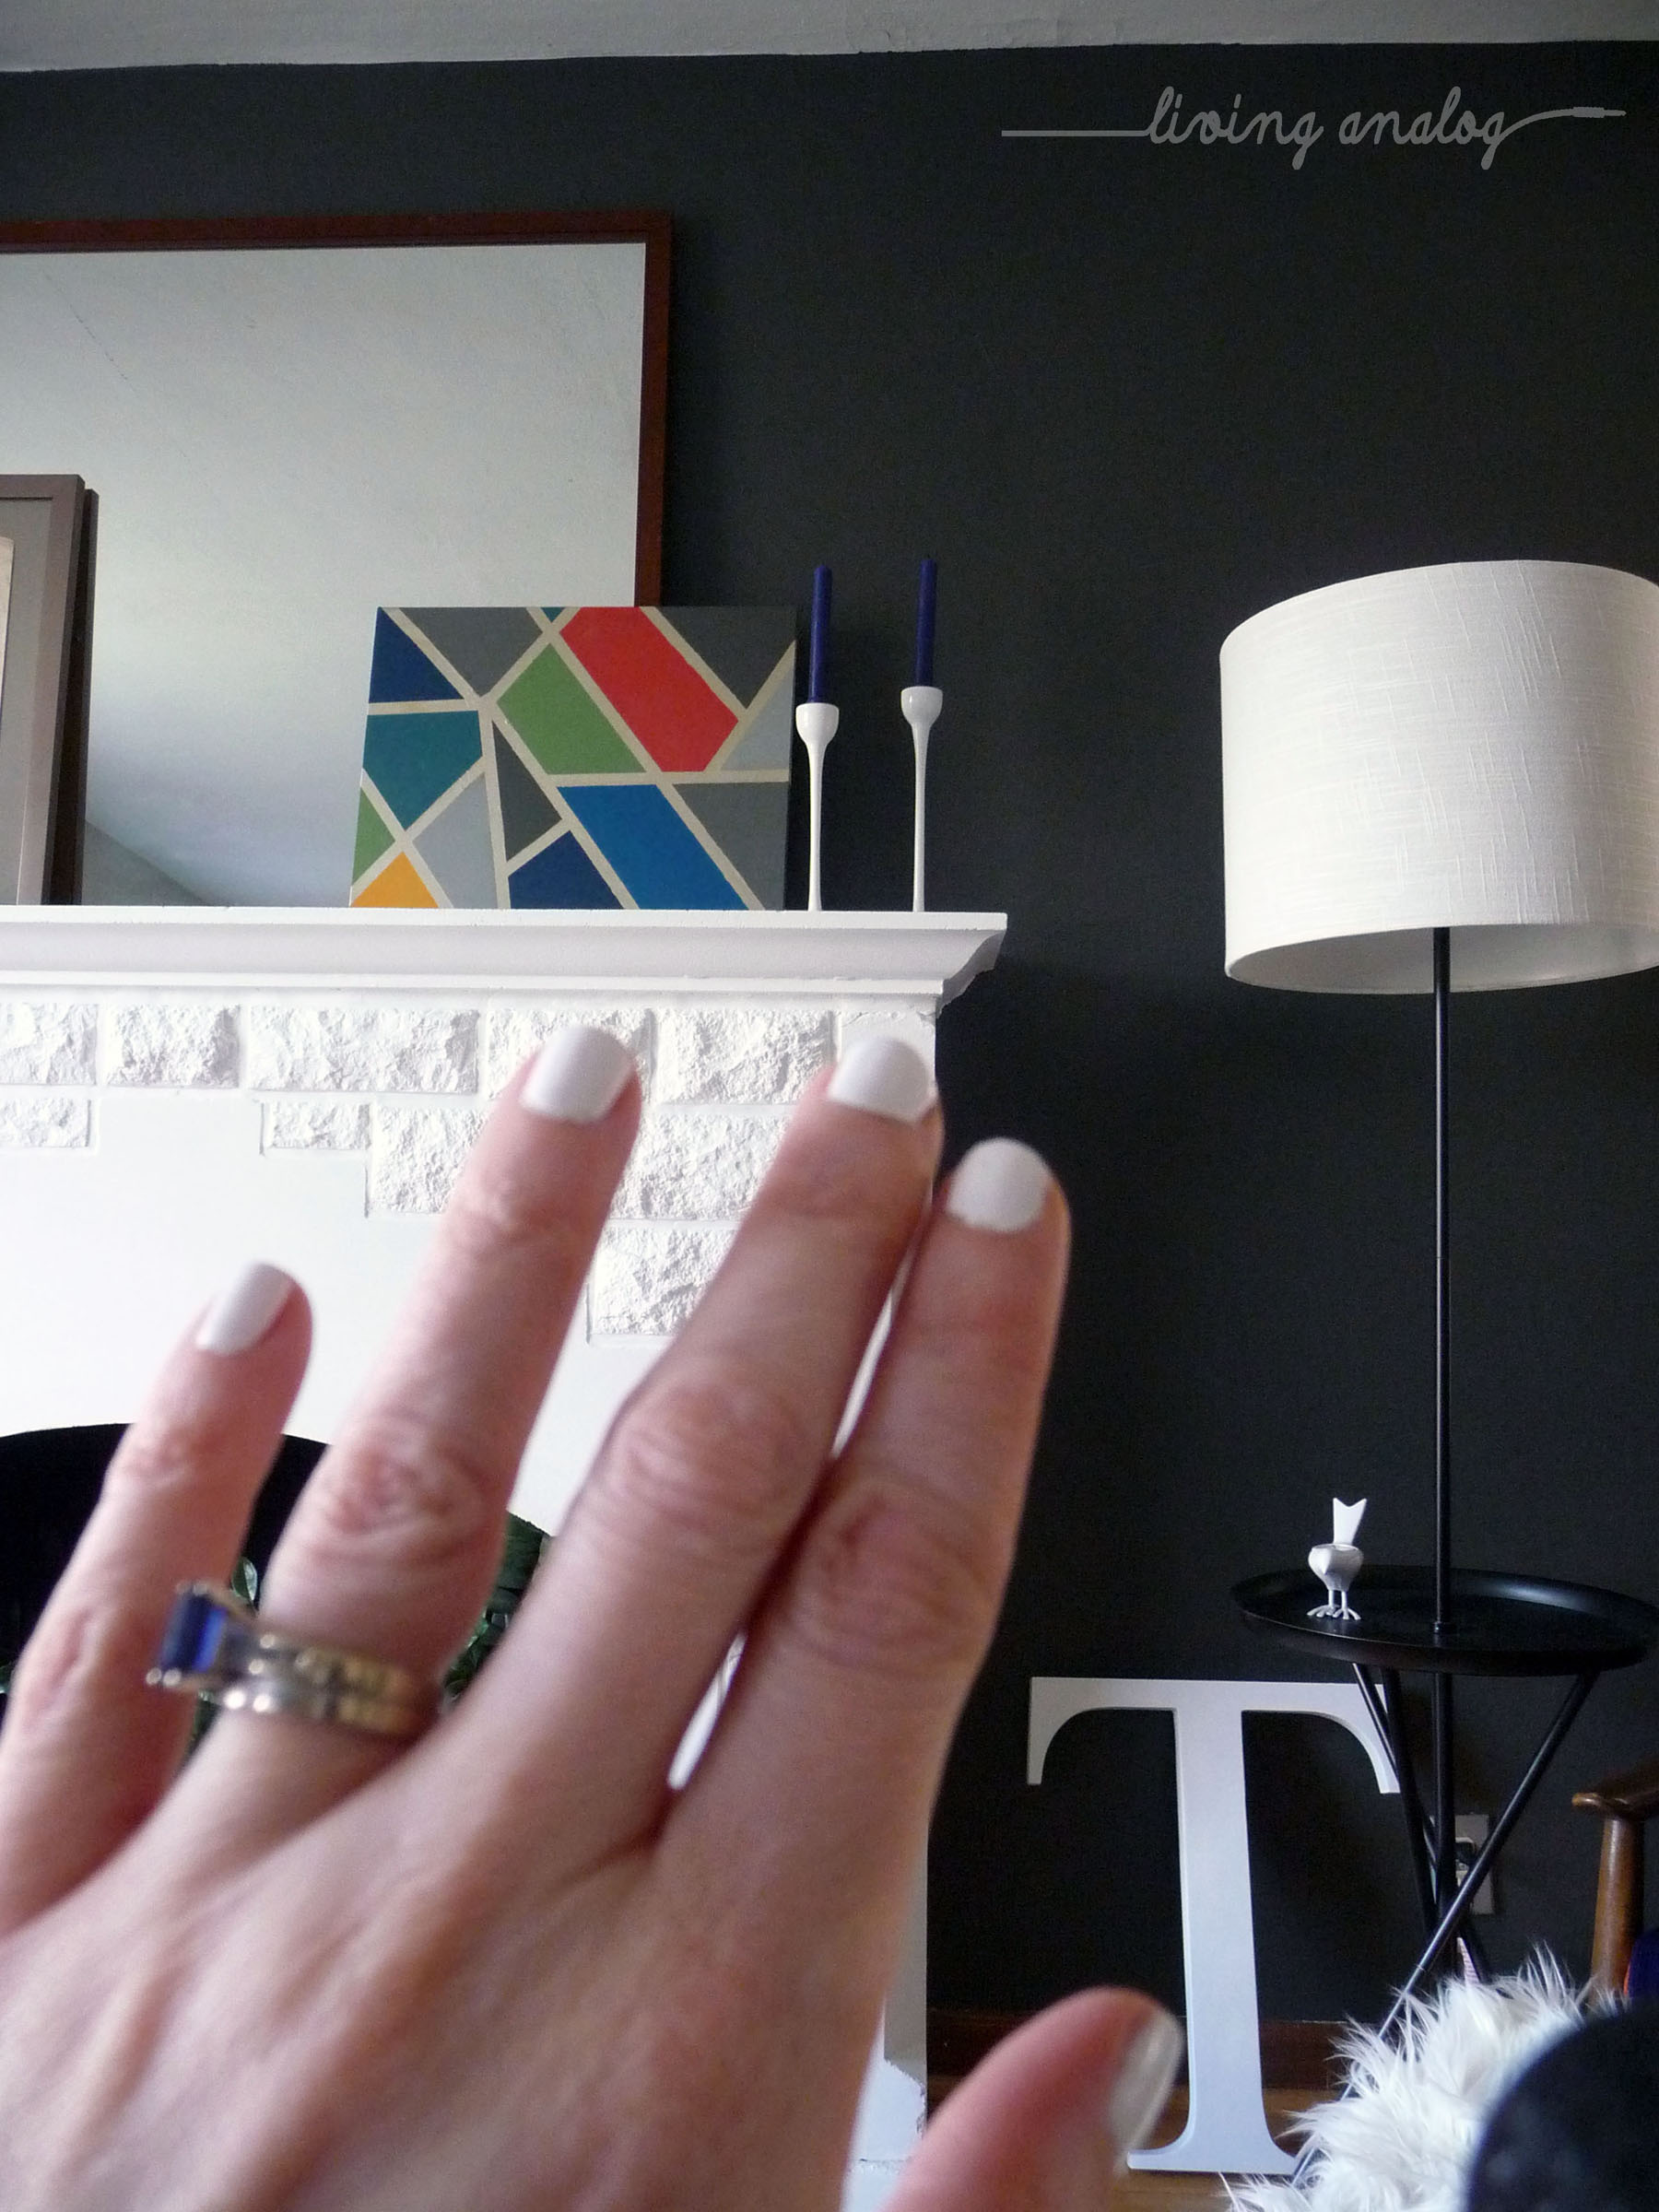
Then I styled it up with a tray I had on hand and some of the items that were living on the coffee table before.

IMG_6618
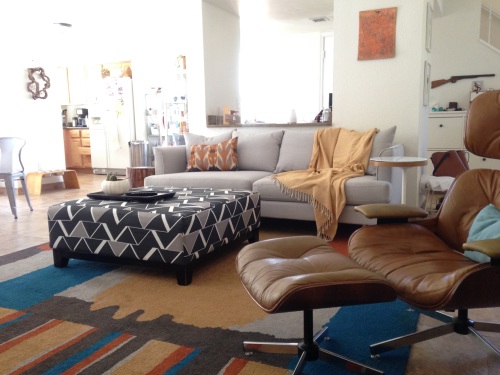
There you have it – the living room has morphed again.  All while Shenanigan gave us the cold shoulder from his puppy pillow perch in the corner.  He is still mad at us for a camping “adventure” we had Friday night near Flagstaff.  Needless to say he was not a happy camper and so we cut the trip short and so our ottoman project was a great diversion on a long weekend.  Have a great short week and we’ll be back at the weekend before you know it!  Cheers – CT

IMG_6612

Night Lights

One thing I didn’t talk about too much when I debuted our new art was the picture lights.  I searched high and low for just the right thing and never quite found what I was looking for – so I MacGuyvered up a solution.

I was looking for picture lights that were a) affordable and b) white.  Affordable large art lights were surprisingly hard to find.  I finally stumbled up these at Shades of Light (not the best picture but all they had on their website so I took a leap of faith).

SHADES OF LIGHT LIGHT

I got out my trusty spray paint and sprayed them matte white so they would blend in with the wall and not fight with the other metal finishes we have going on in the room.  The lights mount to the actual canvas and then we used two screws at the outer corners to mount the canvas to the wall and allow space for the cord to travel down the middle.  They’re hooked to an extension cord behind the bookcase so one flip of the power cord switch and both lights come on.

Night Light

And voila, we have art lights.  The cords peek out at the bottom of the canvases but are mostly hidden behind the record storage unit and camouflaged by the tchotchkes sitting on top.  So in the evening we have a nice glow in the living room and a subtle highlight to the art pieces we worked so hard to create!

Cheers – CT


When Plans Change

As I mentioned the other day, we had an initial plan for our first floor when we moved in and after having lived here for a year and making some furniture investments, it has all shifted.

We knew from Day One that the kitchen was too small.  It didn’t seem to fit in a 3 bedroom, 1600 sf house – JT and I are a family of two and it’s small even for us.  But we had a tiny kitchen in St. Louis (remember that guy, he was in the Small Cool contest once upon a time!) so we knew it could make it work.  And with real estate, you know the saying – location, location, location.  With a mountain in our backyard, we had location covered.

Here’s our first floor plan when we moved in.

\ADMFS1redirectedcthompsonMy DocumentsCT MISC4327CCORRALI took some more photos of the kitchen today just to illustrate its postage stamp size.

IMG_6321

And don’t forget the boob lights – a matched pair!

Often when we are cooking in here (especially on the weekend when I like to prep a few meals at a time, the counter can be entirely taken over.

IMG_5547

Like so.  Bad picture but you get the idea.  This tiny kitchen gave us just enough cabinet space for our dishes and cookware but nowhere to go with all our food, spices and baking supplies.  So the breakfast nook became the pantry.

DSC_1234

When we were buying the house, I had my eye on the wet bar as the solution to our floor plan conundrum.  Standing at the wet bar, you’re within steps to either the kitchen sink or the first floor half bath sink.  So a wet bar sink didn’t seem all that necessary. Here’s a photo for reference (because this post is going to need more photos …)

lr 1

I envisioned walling it off towards the living room, and turning it into a large pantry accessible from the hallway side.  One side of the wet bar is already a coat closet and since we currently have all three of our coats (used mainly for skiing in Flagstaff rather than used in Phoenix) in the laundry room, I thought we could open it all up into one large closet/pantry.  I had dreams of an appliance garage and a mobile baking station and hiding oodles of clutter behind some kind of funky barn door system.

\ADMFS1redirectedcthompsonMy DocumentsCT MISC4327CCORRAL

I still think this plan works well for the space it makes in the living room.  Haha, I just saw that my plan is mislabeled – copy/paste wins again – and there really isn’t a dining component in the living space in this option.  I thought once we walled off the back of the wet bar, we would hang the TV there and make a cool fauxdenza or some sort of media wall.  Then there could be a desk by the patio window.  In the breakfast nook I was planning a counter height or bar height large table with a butcher block top so it could be used as additional counter and food prep space.  This solves a lot of problems with minimal cash outflow (of course at some point I would still love new appliances, countertops and cabinets also ….)

And then one day JT and I were talking about how lucky we were to live next to a mountain and wondering how it came to be that our house ever sat empty on the market for as long as it did.  And we came to the same conclusion – it had to be the kitchen size.  And a new floor plan idea came to life that may actually solve this conundrum.

\ADMFS1redirectedcthompsonMy DocumentsCT MISC4327CCORRAL

In this scenario, the dreaded wet bar and associated coat closet get demolished entirely.  It would mean all new flooring through out this level (good-bye dreary dirt brown floors!)  We would blow out the wing walls around the current U-shape kitchen and open it up as much as possible.  There is still a jut-out in the shape of the floor plate so we would turn that into a nook filled with a 24″ wide all refrigerator, base cabinets and a 36″ wide under counter two door freezer.  The windows in the breakfast nook now go below the counter height so we would have to replace the windows there.  And since we would have to replace the window, I would go down to a 5′-0″ opening so we could have a 24″ wide tall pantry to mirror the fridge.  Continuing into the existing U-shape foot print, we would have one piece of wall blank where we could hang our pots and pans on a rail (I really loved the ease of access for that in our last house.)  I would be able to center the sink on the window (it makes me crazy that it’s off center now) and move the dishwasher to the other side so it wouldn’t be so in the way when it’s open.  I would keep the range in the same location and I think maybe open shelves or some kind of cool upper cabinets would go on that wall that would tie into a proper range hood.   Then we would extend the counter out into the living space so we could have stools on the other side and the person in the kitchen isn’t cut-off from the living space so much.  Opening up the kitchen like this also makes room for an island.  I think we would just do a furniture one versus a built-in but OMG – so much more storage in this option, even though we would lose a wall of upper cabinets.

003-lennox-street-house-corben-architects

And if it could end up looking like this house (in Australia, of course) designed by Corben Architects and found here, that would be pretty amazing too.  As you can see, this is a big dream that would involve a decently big budget so we need to figure out our next steps.  Right now I’m just going to get take out and forget we even have a kitchen.

Cheers – CT


Fanning the flames

When it comes to finding a good looking, modern but not spaceship-like fan with a light kit that is not four figures, the search is real and the search is long.

ORIG FAN

Our house was fully “renovated” in 2007.  I’m pretty sure the owners intended to sell it after the renovation but instead the housing bubble burst so they kept it as a rental property.  The former owners are both local realtors and did seem to care about quality in their renovation but unfortunately their style and my style aren’t quite the same.  So while the Hunter ceiling fans in every major room in the house all work well and may be to some people’s liking, they just had to go. (And away then went, to the Habitat for Humanity ReStore.)  However as much as I would have loved to just put light fixtures up in their place, the heat in Phoenix doesn’t make that a practical solution.  So I’ve been building a Pinterest board of fans that I didn’t hate and biding my time.

We tackled the living room first where there are two of these bronze and wood beauties (you can see the original listing photos of the space here). The main goal of the fans in this space is to be unobtrusive.  I just needed something with a light kit and I wanted it to blend away.  Here’s a side by side of the new with the old for contrast.

SIDE BY SIDE

Enter the Merwry from Home Depot. It fit all the criteria and at only $124 was something that didn’t cause too much pain when we needed two.

DR VIEW

JT installed them with minimal help from me (I’ve had bronchitis and a horrible, can’t seem to recover from cold, it’s hit me harder this year than any other time I can remember in the recent past and I was pretty much worthless for a month) and the improvement was immediate.  They’re quieter to operate and don’t have those stupid cords to hang down and clink around.  They each have a remote control which I labeled “A” and “B” on the back and we can dim each fan light individually and change the speeds.

LR VIEW 1

Since I had the camera out, I took a few shots around the living room.  JT and I made and painted two large canvases that we’re going to hang on that large expanse of white wall.  They’ve been in the garage waiting for a while as we get some other items sorted out like the picture lights and a new sofa. (Not to worry, the daybeds are going upstairs to our office. More changes, the only thing constant in life.)  You might be able to spot a Shenanigan lump back in his favorite corner, he lives back there and seems to like the kind of enclosed, sheltered space as his own little club house.

We just celebrated one year in our new house and while we still have tons of projects to go, our main living space has come a long way.

From this …

lr 1

To this …

DR VIEW 2

I should have cropped out the boob light back in the kitchen.  Still more projects to come!

Thank you to everyone for your kind words on Sophie.  Between her passing, the bronchitis, some heavy stress and deadlines at work and other general crap, the last few months have passed by with not much blog activity.  Now we’re into March, Phoenix is orange blossom scented and my office hired a new person to lessen my burden so I’m going to rededicate myself to both our digital and analog homes.  I hope to see you around.  Cheers – CT

Tree Stump Table

So we have this amazing view of South Mountain in our backyard, but when we moved in it was blocked by two trees. Well, one tree and one sad-sack-of-shit tree stump that was totally overgrown with weeds. We were sure it was providing hiding places for snakes, coyotes, tarantulas, hikers, hipsters.

Big crappy trees

Big crappy trees

No more big crappy trees

No more big crappy trees

We had someone come out and cut them down, which they did in about 2 hours flat. One by-product was a couple logs, one of which I decided to turn into a tree stump table so I could contribute to CT’s living room design.

When I went to grab the stump, I found a giant bug on it. Maybe it was a molted shell, maybe it was alive……I don’t know. All I know is I saw something brown, green and about 5 inches long in a split second before I dropped it and jumped-jerked-pirouetted away. I then soaked it for about 3 minutes with the hose. From there I gathered up the courage to gather it up and set it in the sun for few days to dry out in the midsummer Arizona sun.

Sanded, ready for poly

Sanded, ready for poly

Once I got it into the garage, I began sanding it. Quite honestly I really didn’t know how much sanding I wanted to do. The whole idea of this project was bringing in a rustic touch, but at the same time I needed some leveling of the ends. My solution was starting with medium-coarse grit and finishing with 600 grit. Just enough to smooth out the real rough spots. I cleaned it off with a can of compressed air, and started in with layers of clear brush-on polyurethane. After a few weeks of curing, it was ready to bring in and enjoy.

3EB6F042-C389-4A1F-AAC8-D339A5EF9D0C_L0_001

So early retirement didn’t quite work out ….

Something has happened here at Living Analog that has pulled me out of early retirement, off the bench, back from the dead …. pick your metaphor. It’s been a long strange trip, but the Danish daybeds we purchased way, way, way back in 2011 are done.  Upholstered (by a professional), wood doctored up (by me with Howard’s Restor-a-finish) and in place in our new house.  Yes, we bought a place in Phoenix and are working, working, working to make our new house feel like our home.

But first, the daybeds.  Here they are in all their glory on Mister Modtomic’s driveway:

MR MODTOMIC DANISH DAYBEDS And here they are now, presiding over the living room of our new house.  LR_01

(That’s JT’s guitar hook on the wall, the guitar was with him at band practice but it is a refinish job that he did and matches the grey of the new upholstery really well.)IMG_4512

I was able to get the fabric on super sale at SAS Fabrics up on 19th Avenue.  They were getting rid of a lot of their upholstery fabrics and so the grey material was really cheap – I can’t remember exactly (because that was like 6 months ago and I’m losing my mind) but I think it ended up being around $5 a yard.  Don’t quote me on that.  Upholstery labor costs seem to be a bit more affordable in PHX than they were in STL as well…

IMG_4514

My mom paid for the upholstery work as a house-warming gift and I love these guys so much.  We decided to go with five 24″ x 24″ loose pillows for the backs rather than replicating the triangle bolsters that had been on the daybeds before.  We got new 6″ super firm foam for the bases as well.  These daybeds are comfy – both JT and I have already taken a few snoozes on them.  The dogs are getting older and with no traction from the tile floor, don’t like to jump up that high so they just keep to their dog beds on the floor, which is fine by me.

IMG_4515

So that’s our news.  My goal is to begin posting again more regularly as we start up all sorts of fun projects on the new (to us) house.  We are in the Awhatukee  area of Phoenix with short drives to work and an amazing mountain view.  And a hot tub in the backyard from which to enjoy said mountain.

IMG_4412

The location is really what sold us on the house …. from the front it is all garage and tan stucco which is pretty much the bane of my existence.  For my next post, I’ll go into the back story of the new house.  I’ve missed my little corner of the blogosphere, thanks to those who dropped me notes to check in.  Our laptop was at the point where it took at least thirty agonizing minutes just to load the internet and after a 10 hour work day, I just didn’t have the patience to fight the computer over a blog post.  JT found us a mac he was interested in for music recording purposes and I love our zippy new machine although I’m having to relearn all things posting related since I haven’t used a mac since my college days ….

Cheers!  CT

You don’t need to huff the spray paint to be addicted to it . . . sad but true.

Awhile back, we picked up the “Crosby” floor lamp from World Market.  This is one of the few larger dollar purchases I have made from a big box retailer apart from our occasional long-haul treks to Ikea.  We tend to scour the local thrifts, junk malls and Craigslist for our treasures.  But we were in need of light in that corner and a table and this just sort of happened one day.

Once we started to live with Crosby for a while, we realized he was a chameleon.  And not so much in a good way.  We love the color of our accent wall (SW Urbane Bronze) but putting the black metal Crosby’s little frame up against it just made him disappear.

CHAMELEON

Since Crosby wasn’t a priceless fancy-designer label or other sort of “don’t paint me” treasure, I went ahead and decided to paint him.  It was either him or the wall and if I did the wall then I’d have to do the fireplace again and . . . you can see how I ended up picking the lamp.  I had some muted matte gold spray paint left over from my Pinterest-inspired art and so I tackled Crosby with that.

BORING GOLD

And . . . it was better.  But still meh.  This picture is a broad daylight view that we rarely get to enjoy, being chained to desks at our offices from 8-to-5 like most corporate drones.  In the evenings he still kind of faded away against the wall.   I wanted something a little punchier.  So I got a brassier, bolder hue at Lowe’s and sprayed poor old Crosby down again.

ALL THE WAY GOLD

Finally a win!  Now Crosby ties in nicely with our brass arc lamp from the auction last year (I had threatened to paint the arc lamp black but since it was vintage it got spared.) As an added plus, I’m starting to feel on trend (or dragging slightly behind it as usual) with all the gold/brass accents popping up in blog land everywhere.  And in a few years when blue/white/grey/purple/whatever is the new brass, I’ll just spray him down again.  Nothing to it.

Also, since I’m sharing this view over and over again of the Baumritter “Man Chair”  I’m adding some pictures of the tags on the underside of the ottoman.  The internet connect me with a reader, Elliott, who was looking to see if the ottoman was intended to come with the chair.  Our chair itself has no markings on it — I got pretty up close and personal with it when we did the straps and cleaned it off with the Restore-a-Finish so I’m 100% certain of that.  What tipped me off that this was a Baumritter was actually the tags on the ottoman, like so:

TAG 1

TAG 2

The Adjusto Lounge or Style # 1617-1 Lounge.  Hope this helps Elliott!  I’d love to see any images of your Baumritter lounger — ours needs an upholstery makeover pretty badly.

Next up – some more Style Cure updates!  Cheers – CT

Changing it up. Again. And again.

I don’t know how many more times I can post about changes in the living room before you guys gather your pitchforks and torches and chase me from the interwebs but here goes nothing.

We’ve been living with a chair party since the couch left.

0_CHAIR PARTY

(Mostly all of) the chairs I’ve hoarded came out to play.  It was making me feel old though because JT would end up in the “man chair” (the Baumritter lounger with the “Cover Your Lover” blanket on it currently) and I would end up on the Kroehler white vinyl swivel chair, side-by-side like we had suddenly turned into our grandparents in “their chairs”.  I mean everyone’s grandparents did that right — there was a “his” and “hers” chair and don’t you dare sit in it if Grandma or Grandpa were around.  Our original plan was to clear out the old tan sofa to make room for the Danish Daybeds but . . . . after getting some prices to have the foam redone and cushion covers made  it was a jaw-dropping, I-better-learn-how-to-sew-right-now kind of price.  (In reality, the quotes weren’t bad, they’re just out of our budget right now.)

So, what’s in our budget that would allow me to occaisonally sit next to my husband? This little gem from Craigslist.

0_CRAIGSLIST AD copy

I had scouted the “list” and found a few options that could work for us, including a Karlstad (Ikea) sofa that looked almost brand new but this guy just tugged at my retro/vintage heartstrings.

I mean, look at it!

0_CRAIGSLIST AD ENLARGED IMAGE

It turned out to be in a third floor apartment (no elevator) near Wash U.  The scale was such that JT and I could easily heft it down the stairs and it fit into the Saturn with the back door all the way closed.  So it’s not nearly as big/long as our outgoing sofa but it will nicely fill a void until I get some courage and tackle those daybeds.  Now JT and I can morph back into 32 (and 33 – happy early birthday honey!) year-olds rather than the old people we had become.

Here it is at home and cleaned up a little (good old Howard’s Feed and Wax on the legs and some vinyl cleaner on the seat).

0_IN SITU

There’s a few tears and age spots here and there but overall I really like it.  It’s a little less white than the ad pictures showed — it is more of a subtle yellow with avocado undertones and almost matches our Eames rocker perfectly.  I’ll be back with another (!) post on how we rearranged the living room a few times to get “Newbie” (as I have named the sofa) to fit into our life and home.

Here are some outtakes of what happens when I try to take furniture photos.  Dogs.  Everywhere.  Cameron is apparently not camera-shy at all, but very interested in being front and center in all photos.  That dog is funny weird (in a good way).

0_DOGS IN A PICTURE

It may sound weird . . . but I kind of miss our couch. Sniff.

COUCH GO BYE BYE

The couch left us on Saturday, on to a new life in the “mixing lounge”.

LAZY LUMPS

We had this big leather baby for at least seven years — right when we bought the house, we quickly realized the sectional sofa we had in our apartment wasn’t going to fit (the chaise sat on the wrong side and couldn’t be reconfigured).  So we marched on out to Value Village Furniture on Chippewa and found this thing for only $700.  It was fate — that was just the amount we had squeezed out of the sectional during a Craigslist sale and we were b.r.o.k.e. having just bought our first home.

GUARD DOG

We did a lot of living on that sofa and I was a little sad to see it go even though I have a new one (sort of) waiting in the wings.  It was time though.  The monkeys (and JT and I) had worn the seats down a little (it was probably bonded leather) and there is a ring on one of the arms from a too hot coffee mug.

Up next is the Danish Daybeds but . . . I still don’t have the upholstery fabric picked out!  Trouble.

SOPHIE DOUBTS ME

Once the sofa left, the room was looking a little bare and the floors were looking really dirty.  I threw all the small items in the kitchen and herded the dogs into the hallway and decided to try out the Bona floorcare system from Home Depot. (Cameron is hiding in the bedroom because he isn’t as accustomed to large furniture rearranging as Sophie and Shenanigan).

JUMBLED MESSES

I had another wood floor cleaner I was using but the floor never really looked shiny clean.  It turns out what I was probably missing was some wax or polish.

MORE MESS

Here’s another view of the living room/dining room while it was emptied out.  The Bona system worked well but I think I almost need to do a few more coats of the polish to build up and fill in more of the cracks and crevasses in the floor.

I looked through the post I did back in December of 2011 when we got the Danish Daybeds and here was the floor plan I had posted:

E:CT HOUSE3341 JAN 2011 Model (1)

Everything has changed!  Back to the drawing board!!

Another one about homemade art

One more post about artist canvases.  I’m not a painter.  I never had any formal training in painting.  I did have to take one drawing class in college and it was miserable.  I hated the critique days and having to put my deformed and pathetic sketches up next to my classmates beautifully rendered images.  But sometimes you need artwork for your house and you’re cash-strapped and you resort to painting it yourself.

Let me rewind for a minute.  A few months back I picked up a little canvas at the local St. Vincent de Paul thrift shop.  I searched high and low for the original images but to no avail — when I bought it, the canvas had a lavender background with white flowers painted on it.  It looked like something I would have presented in college had I been required to take a painting class (a little amateur-ish to say the least).  I felt a little bad when I jesso-ed over the canvas until I remembered it had been consigned over to St. Vincent de Paul.

Part two of this long-winded and potentially underwhelming story has to do with the brassy arc lamp I picked up at the auction at Vandeventer Vintage.  I was considering giving it a new coat of (spray) paint, maybe in black to help it fit in with the living room a little better.  (Read more of my angst here when we brought home a second lamp).  I decided instead of painting this great vintage gem, I would bring in more brassy/gold goodness to make it feel at home.

Back to the painting.  First I jesso-ed it, then I applied a few coats of a gold spray paint I had on hand.  I found a cool example image on Pinterest that had large blocks of color and used that as my starting point.  At first I had taped the canvas off with some 1″ painters tape we had around the house but the proportions felt weird so I “had to” order some washi tape from Etsy.

IN PROGRESS

The washi tape didn’t perfectly keep the paint inside its boundaries so I had to do a little touch-up once I removed it.   I took over the tulip table and spent a couple of days mixing up paint colors like a mad scientist.  I used the kitchen blue color, the living room accent wall (SW Urbane Bronze) in its full hue and also lightened a few shades with white and a few new colors.  JT requested “light red” and I told him he just asked for pink.  However I was able to mix up a nice red-orange that seemed to satisfy his request.

WHITE CANDLES

The brassy/gold undercoat plus the paint colors from around the house really work to tie things all together in the living room.

WHITE NAILS

Also, white fingernails!  Because Easter was last Sunday, I  feel like we’re in the clear  for white shoe season and I celebrated by putting one of my favorite colors on my nails.  Yesterday (Friday) was one of the first days it really, really felt like spring around here and everyone fled the office for City Garden at lunch.  I had lunch at Lulu’s, an all-vegan food truck (so good!) and took in the sights.  I know I talk about the Flaming Lips a lot, but this sculpture struck me as being very Wayne Coyne-esque.

PINK SUIT

On to the weekend everyone!  I’m taking Cameron to an adoption event today at the Kirkwood Wal-Mart from 11am to 1pm.  Stop by and say hi to the old guy!  Cheers – CT